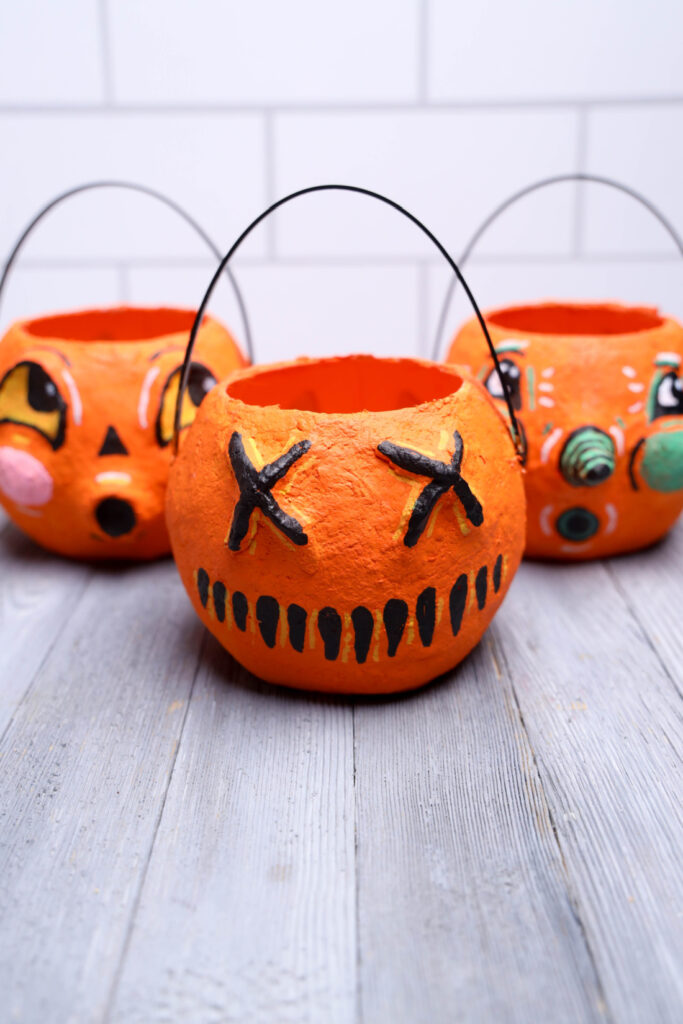
I’ve been obsessed with making these paper mache pumpkins ever since I saw the Sam character from Trick ‘r Treat back in 2019. My first attempt was honestly pretty rough, I used the wrong type of paper mache and it cracked everywhere. But after making at least 20 of them over the last few years, I’ve figured out exactly what works. This tutorial is the method I use now, and it hasn’t failed me yet.
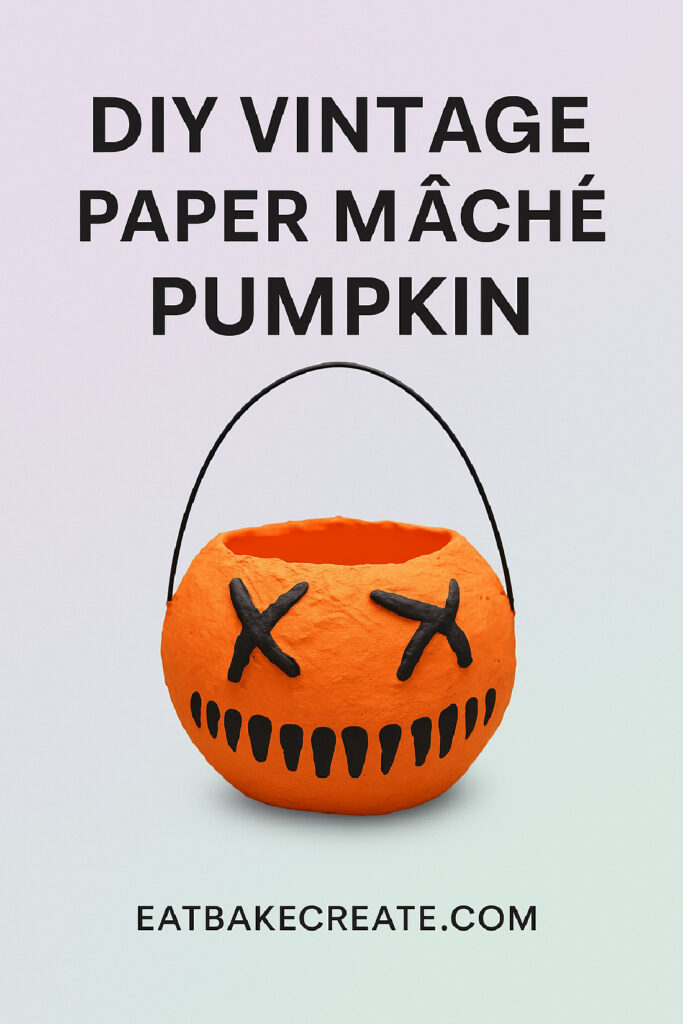
The best part? These pumpkins look like they came from a vintage Halloween collection. People always ask where I bought them, and they’re shocked when I tell them I made them myself. They have that weathered, handcrafted texture you can’t get from store-bought decorations.
Everything You Need For Your Paper Mache Pumpkin
- mini plastic pumpkin pail (dollar store works great, I buy them in bulk every September)
- aluminum foil
- Skinny masking tape (the 1/2 inch width works best)
- Activa CelluClay Instant Paper Mache (get it here)
- Water
- Harvest Orange acrylic paint
- Paintbrush (1-inch flat brush is my go-to)
- Sharpie Paint Pens in black and yellow
- Hot glue gun and glue sticks
Cost breakdown: About $15-20 if you’re buying everything new. The CelluClay bag runs around $12-15 and lasts forever. I’ve made probably 30 pumpkins from one bag. The plastic pumpkins are usually $1 each at Dollar Tree.
Why These Specific Materials Matter
I’ve experimented with different materials, and trust me, substitutions don’t work as well. Regular paper mache paste (flour and water) stays soft and doesn’t hold details. Plaster is too heavy and cracks easily. CelluClay is the sweet spot, it’s lightweight, dries rock-hard, and holds fine details beautifully.
The aluminum foil trick is something I figured out after my first few pumpkins looked too flat. The foil creates a real dimension that makes the eyes pop, giving you that handcrafted, three-dimensional look.
How I Actually Make These Paper Mache Pumpkin
Creating the Face
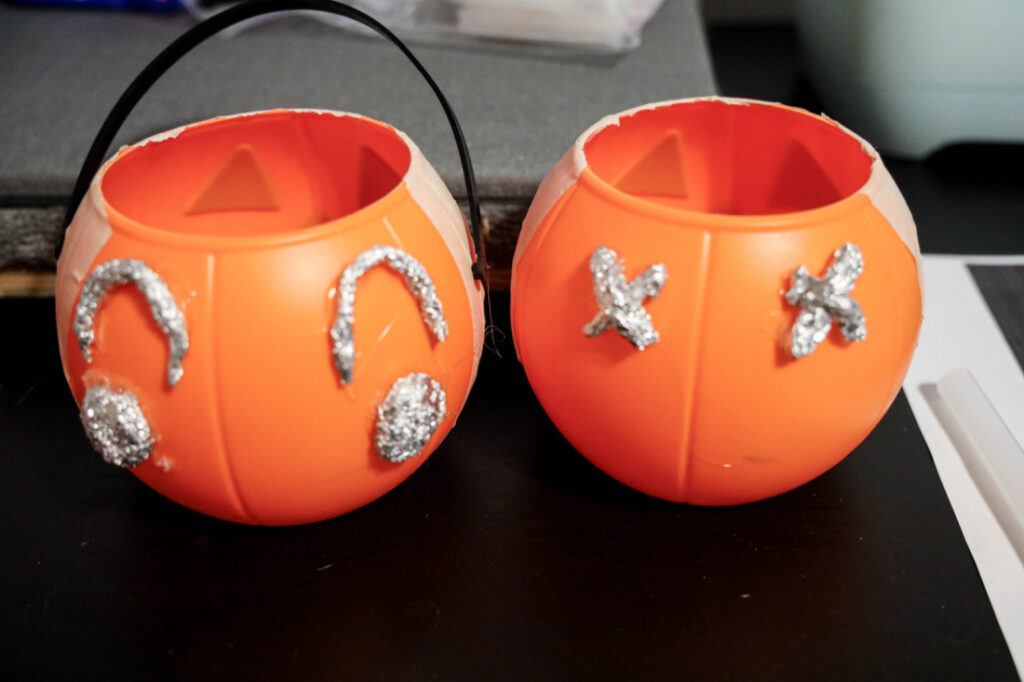
I use aluminum foil to make X-shaped eyes like the Trick ‘r Treat pumpkin. Tear off a piece about 6 inches long and fold it into strips about 1/2 inch wide. Then cross two strips to make an X. Press the foil tight so it’s compact, loose foil causes problems later when the paper mache settles.
You can make whatever facial expression you want. I’ve done traditional jack-o’-lantern faces, creepy wide grins, and even just simple circles for eyes. The process is the same regardless.
Gluing and Taping
Hot-glue the Xs to the back of the plastic pumpkin. I put the glue on the back so you don’t see any bumps or residue on the front surface. Let the glue cool for a minute before you start taping.
Then tape over everything with masking tape. Start at the top and work your way down in overlapping strips. Try to avoid creases as much as possible. This step matters more than you’d think; fewer creases mean a smoother finish. I usually spend about 10-15 minutes just on the taping because it really does make a difference.
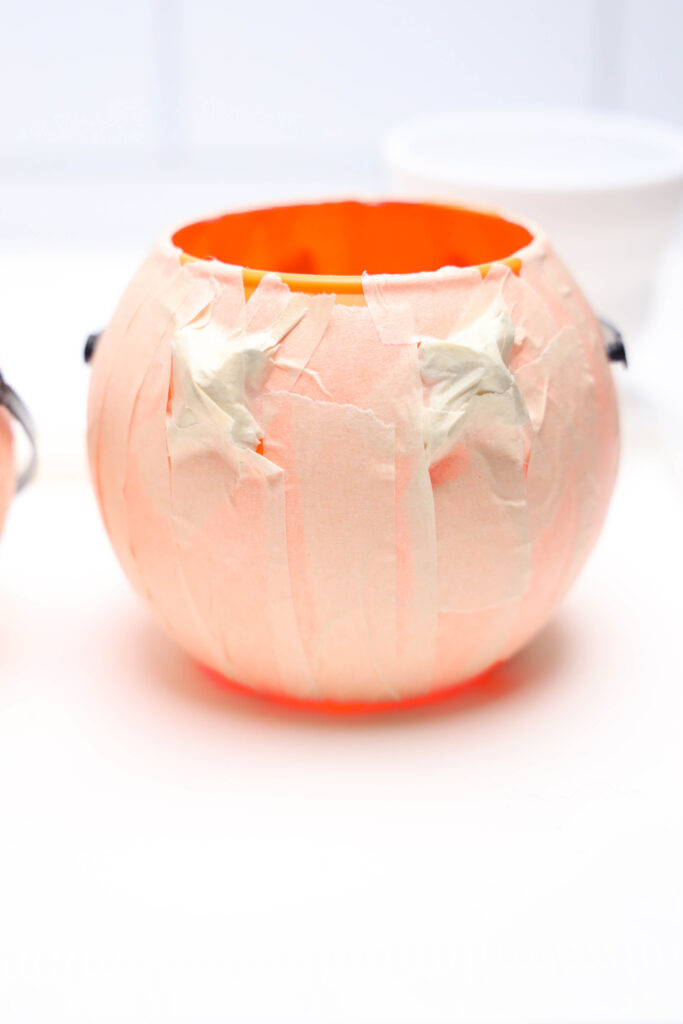
Make sure you cover the entire surface. Any exposed plastic won’t grab the paper mache properly, and you’ll have bare spots.
Mixing the Paper Mache
Forget the package directions, they’re too vague. Here’s my method: scoop out about 2 cups of the dry CelluClay into a bowl. Add water slowly, maybe 1/4 cup at a time. Mix with your hands (I wear gloves because I don’t like the texture, but that’s personal preference).
You want it to feel like pottery clay. It should be smooth and moldable but not sticky or runny. If you squeeze it and it holds its shape without crumbling, you’re good. If water squeezes out, you added too much, add more dry powder to balance it.
I usually mix enough for one pumpkin at a time. The mixed material stays workable for about 30-45 minutes before it starts to set up, so don’t mix a huge batch unless you’re making multiple pumpkins back-to-back.
Applying It
This is where the magic happens. Grab a handful of the mixed paper mache and press it onto the pumpkin. I work in sections, do the front, then rotate to the sides, then the back. Press firmly to make sure it adheres to the tape underneath.
Keep your layer thin, about 1/8 inch thick. I know it’s tempting to go thicker, but trust me on this. Thin layers dry evenly and don’t crack. Thick layers take forever to dry and almost always crack somewhere.
Over the X’s, add extra material to build up that dimension. I usually add another 1/8 inch or so over the eyes to make them really pop out from the surface.
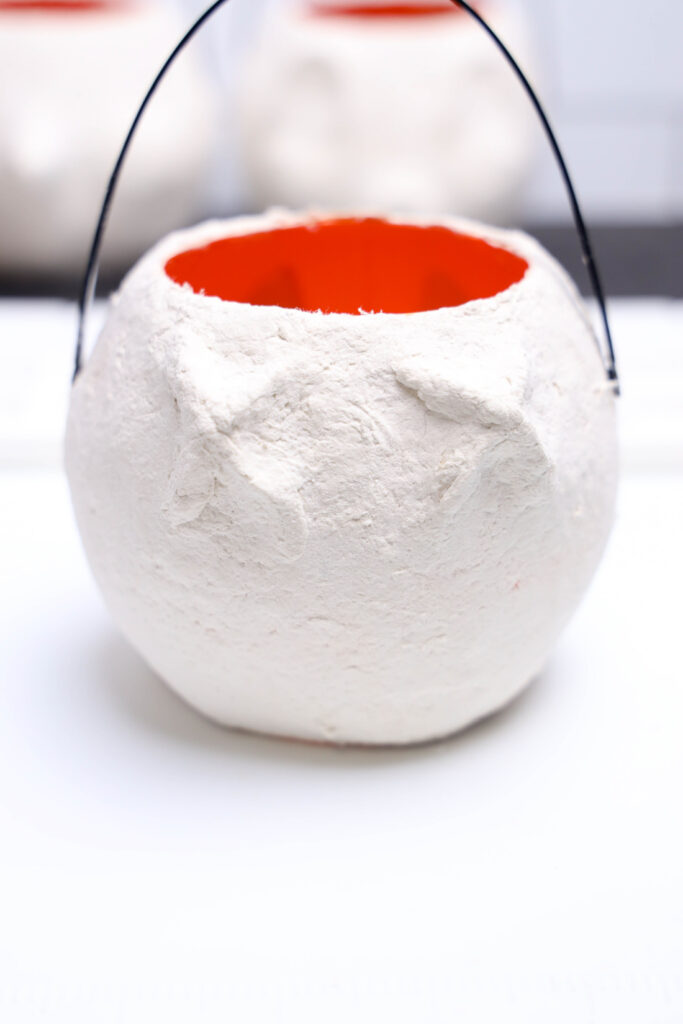
Here’s the trick: keep a small bowl of water and an old credit card or gift card nearby. Dip your fingers in the water and smooth the surface as you go. The card works great for getting flat, even surfaces. Take your time with this step. The smoother you get it now, the less work you have later.
Don’t forget the bottom. I consistently smooth paper mache over the bottom edge so the whole thing looks finished.
Drying Time
Put your pumpkin somewhere it can dry undisturbed. I use a shelf in my garage. Wait at least 24 hours. In humid weather (I’m talking 70%+ humidity), give it 48 hours to be on the safe side.
How do you know if it’s ready? The paper mache should be rock-hard when you tap it. It’ll also be a uniform light gray throughout. If you see any dark gray or brownish spots, that means it’s still damp inside. Give it more time.
I’ve tried speeding this up with a fan or putting it in the sun. It helps a little but not much. Just be patient.
Painting
Once it’s bone dry, paint the whole thing harvest orange. I use regular craft acrylic paint from any craft store, nothing fancy. Do two thin coats instead of one thick one. Thin coats dry faster and look smoother.
Let the first coat dry completely before adding the second. This usually takes about 30 minutes.
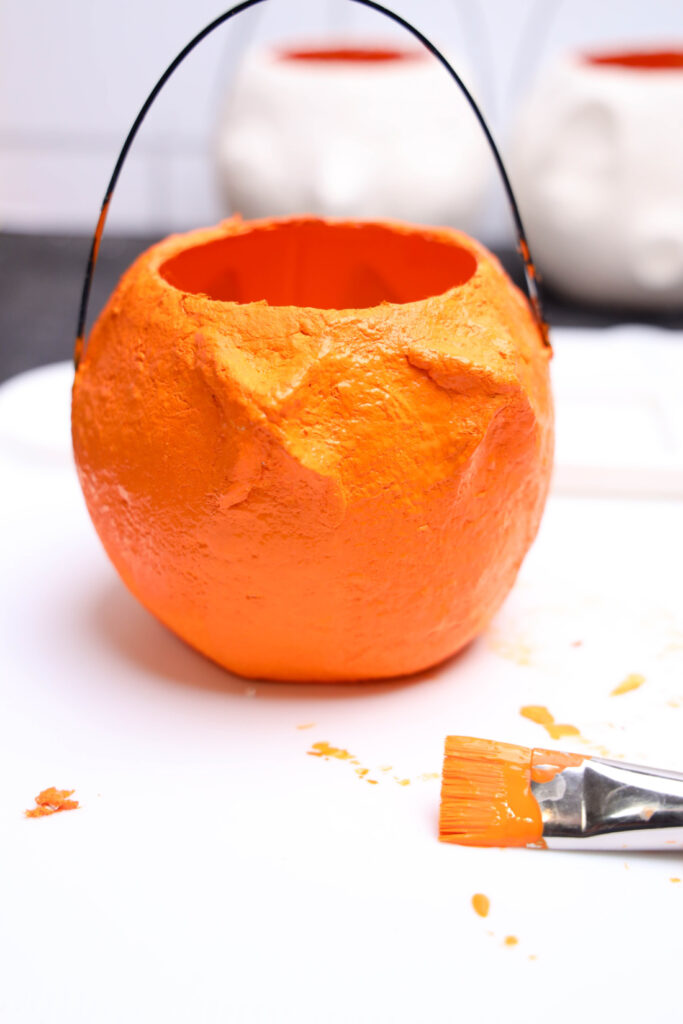
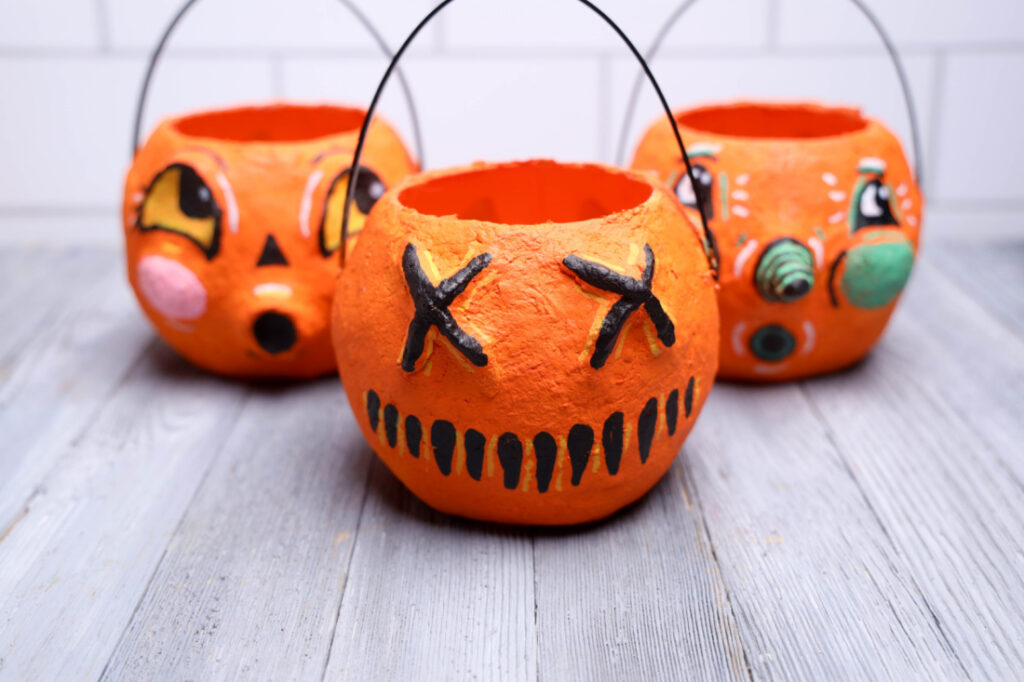
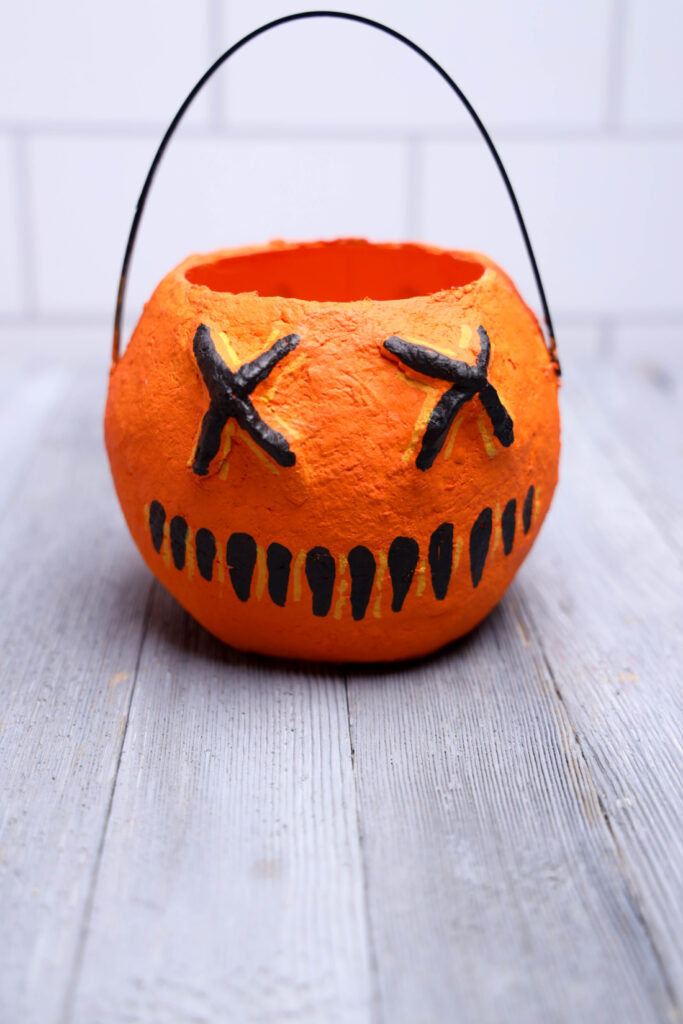
Once the orange is completely dry (I wait at least an hour), use the Sharpie paint pens to draw the mouth and any other details. I use black for the mouth, just a simple stitched line across the middle. Then I add little yellow dots or lines here and there to give it that aged, worn look.
The paint pens give you much more control than a brush. You can do tiny details without worrying about drips or unsteady hands.
What I’ve Learned Making These
The tape really matters. The more tape coverage you have, the better the paper mache sticks. I learned this the hard way when I got lazy on pumpkin number 3 and left gaps. The paper mache just slid right off those spots.
Thin layers dry better. Every single time I’ve had cracking, it’s because I made the layer too thick. I know it feels weird to keep it so thin, but it works.
CelluClay is worth the cost. I tried other paper mache products early on, the traditional paste, some other instant brands. CelluClay dries harder, smoother, and more durable. Don’t substitute it. Just buy it once and you’re set for years.
Paint pens are your friend. Way easier than trying to paint tiny details with a brush. I went through three pumpkins before I discovered paint pens, and I wish I’d used them from the start.
Common Problems I’ve Had
Cracking while drying? Your layer was too thick or your mix was too dry. Add more water next time and keep your layer thinner.
Paper mache won’t stick? You need more tape coverage on the plastic pumpkin. Go back and add more tape, then try again.
Rough, bumpy texture? Smooth it more with water while it’s still wet. If it’s already dry, you can lightly sand it with fine-grit sandpaper (220 grit works well).
Orange paint looks streaky? You need another coat. Sometimes it takes three coats, depending on the quality of your paint.
Storage and Display
These pumpkins are durable, but I still store them carefully. I wrap each one in tissue paper and put them in a plastic bin. They’ve survived three moves and still look perfect.
For display, I group mine on the mantel with some fall leaves and battery-operated candles. They also look great on bookshelves, entryway tables, or as a centerpiece. The vintage texture catches the light, making them look genuinely old.
Time Breakdown
- Making it: 45 minutes to an hour
- Drying: 24-48 hours
- Painting: 1-2 hours with drying time between coats
Plan on 2-3 days total from start to finish if you’re doing just one. I usually make several at once in an assembly line, which is more efficient.
Variations to Try
Once you’ve made a basic one, experiment with different faces. I’ve done:
- Traditional triangle eyes and nose
- Round eyes with stitched mouths
- Asymmetrical faces for a creepier look
- Different colors (black pumpkins with orange details look amazing)
You can also add texture to the surface before it dries by pressing patterns into the paper mache with tools or stamps.
Why I Keep Making These
They last forever. I still have the first successful one I made three years ago, and it looks exactly the same. They’re cheap compared to buying vintage Halloween decorations, which can run $30-50 each online. And honestly, they’re just fun to make. Each one turns out a little different, which gives them character.
My entire mantel is covered with these every October, and they’re always a conversation starter when people come over.
Got questions about the process? Drop them in the comments and I’ll help you troubleshoot.
More Halloween Fun You’ll Love
Vintage Paper Mache Pumpkin
Vintage Paper Mache Pumpkin

There's something wonderfully nostalgic about vintage Halloween decorations, those weathered, hand-crafted pieces that look like they've been pulled from a dusty attic trunk. Today, I'm going to show you how to create your own vintage-style pumpkin decoration using paper mache, inspired by the iconic jack-o'-lantern from Trick 'r Treat.
Materials
- 1 mini plastic pumpkin pail
- 2 sheets aluminum foil
- Masking tape - skinny
- Activa CelluClay Instant Paper Mache (amount depends on what you plan to make)
- Water
- Harvest Orange acrylic paint
- Paint Brush
- Sharpie Paint Pens
- Hot Glue
- Hot Glue Gun
Instructions
- Make the face you want on the pumpkin. Here I used the foil to make X's for eyes in resemblance to the Trick R' Treat pumpkin.
- Hot glue the X's onto the back of the pumpkin. Tape the pumpkin with leaving the least amount of creases as possible.
- Mix paper mache as directed. I usually eye ball this by add a little water at a time and mixing with my hands till it becomes like clay. Once it is like a clay it's ready.
- Add the paper mache to the pumpkin pressing down to get it as a thin layer but one that covers. Over the X's I usually add more to get the lifted look. Smooth out the paper mache with water or an old credit card.
- Let dry at least 24 hours before painting.
- Paint the pumpkin with one solid color like harvest orange. Use sharpie creative paint pens to draw on the rest of the areas that you would like. Here I used black and yellow once the orange was dry. I draw on the mouth of the Trick r' Treat pumpkin. Let dry and it's ready to use as a cut decoration.
